 There are some professional development course you attend that inspires you. You go back into your classroom and you think... Oh, wait! This is too expensive, not enough space... and the story goes on and the training had no real impact on your classroom practice.
If however, you happen to go on a RaspberryPi training, or PiCademy for short, not only will you come back to school buzzing, you'll come back knowing where to start and what to do.
I recently returned from Cambridge, HQ of all things Pi and met some amazing people that didn't frown upon this math teacher wanting to learn how to code (and knowing very little) and apply it in my classroom. If fact, I was encouraged and inspired!
My Pi journey started when I was introduced to all things Pi by my lovely friend and colleague, Lenny Dutton () that attended the very first PiCademy (Read all about her experience in her blog). We attended a RaspberryJam soon after that and I was blown away (and slightly overwhelmed). Lenny encouraged me to apply to a PiCademy. The process was straightforward and at the end you need to upload a video explaining your reason for wanting to attend.
My PiCademy application video below:
I was of course thrilled to be accepted and very quickly connected with other people over Twitter that was going to be attending the same time. If you consider attending, I would suggest this as it was great turning up already 'knowing' people.
 |
| The new and improved Pi2 |
We received all the essentials to get us going and from the start it was all hands on deck.
 |
| Babbage was present to cheer us on! |
My day started with an introduction to SonicPi and how fortunate to have the workshop run by the man that created it, Sam (@samaaron)! The code is so simple and straightforward, you have your own piece of music in a few minutes.
For example:
Play 85
Will mean that the 85th note on the piano will be played, you can add drums and any other instrument you want to. Sam also introduced us to live loops meaning you can change the code in real time.
Here is an example of him performing at a nightclub in Berlin using live loops - music on the go!
Here is an example of him performing at a nightclub in Berlin using live loops - music on the go!
 |
| Apologies for the bad quality photo! |
The session after that Ben (@ben_nuttall) showed us all things PiCam and of course with that a selfie! This photo on the screen is a photo taken by the PiCamera and the phone you see is taken by my phone....
 |
| PiCam in action |
 |
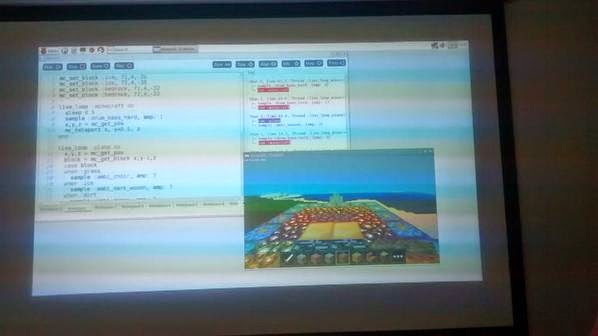
| Above: Image of Minecraft with my message |
 |
| Above: Steve on his multicoloured bridge |
And the code for it is just a few lines!
 |
| Above: Code making this possible |
One of the last things we were introduced to by Dave (@dave_spice) was the AstroPi that completely grabbed my imagination! This made me super excited as a Science teacher as the options here are endless! The AstroPi has so many cool features such as a magnetometer, gyrometer and accelerometer along with an ... Oh LED screen!
 |
| Above: you can see part of the message "One small step for Pi" scrolling the screen. |
Day 1 concluded with a lovely meal in a restaurant on the river Cam.
Day 2 was a day of going away and doing everything yourself. We were asked to think about what grabbed our attention on the first day and to create something. There were such interesting projects creating, such as this one by Mark(@mvnorwood) and Grace(@MissTurner101) where you press Babbage's tummy and he gives you and inspirational quote.
 |
| Above: Babbage providing a quote when you push his tummy. |
Of course my own bias comes in when I say the last project I'm going to mentioned rocked!!! David(@DesignSaunders) and I hacked an AstroPi and created our very own... MagniPi. The purpose being that if AstroPi can go to space - it can also be used to safe lives. Our idea is that you will place the Pi on the ground and every time there is movement in the ground (more than just vibrations from moving cars, kids playing etc.), of course the theoretical aspects still needs to be sorted, then by using our code, as soon as the Pi moves (more than 10 degrees in either direction), if will tweet a message to you saying: "Get out of here!"
 |
| Hacking the AstroPi to turn it in a MagniPi |
And finally we had the opportunity to add our twitter accounts the RCE (RaspberryPi Certified Educators) wall of fame:

 And finally I can now say that I am an RCE and this is going to be the start of many amazing all things RaspberryPi to come!
Word of thanks to all the amazing people that organised PiCademy such as Carrie Ann (@MissPhilbin) and James (@jrobinson_uk) that was always on hand to help and a special thanks Lenny (@missedutton) that encouraged me to apply.
How to get involved: Visit the RaspberryPi website and click on this link to apply for an upcoming PiCademy, so that you can join this photo and be part of the next cohort of RCE's and meet amazing people along the way!
How to get involved: Visit the RaspberryPi website and click on this link to apply for an upcoming PiCademy, so that you can join this photo and be part of the next cohort of RCE's and meet amazing people along the way!
 |
| Cohort no.8 graduates with a superhero pose! |


